
Flammkuchen Dough
About This Dough
Flammkuchen dough is designed to be stretched very thin. This dough is versatile enough for baking on a pizza stone, cooking on the stovetop, or—one of my favorite ways—baking it on the grill.
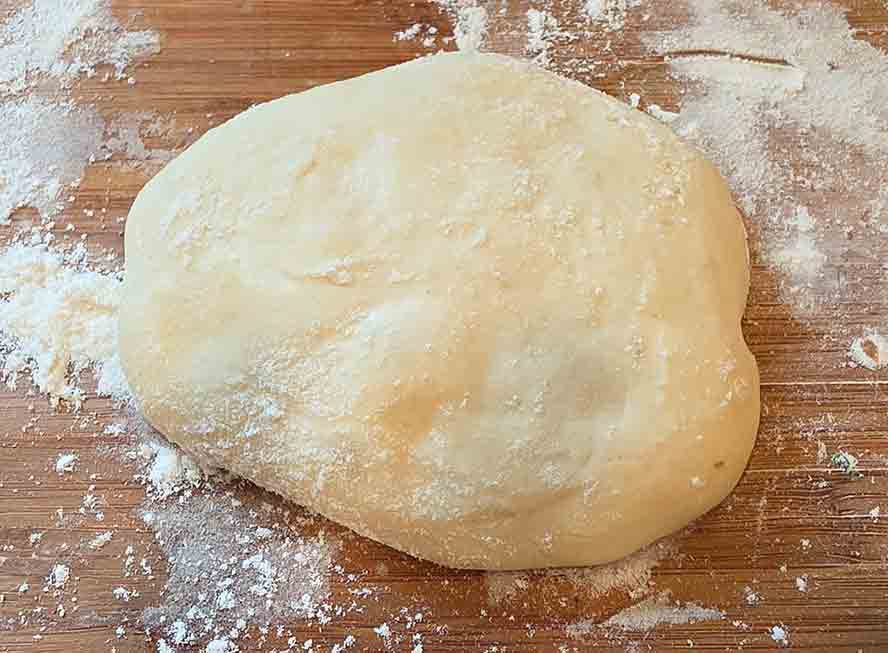
It is a relatively high-hydration dough, but don’t let that fool you. After a two-day cold fermentation, the dough becomes surprisingly easy to handle and stretch. It may look a little sticky when you first take it from the refrigerator, but a light dusting of flour is all you need. It won’t cling to your hands or your work surface, and I like fermenting it right in a plastic storage bag because the dough comes out easily without sticking to the bag.
The long fermentation does two important things. First, it allows the gluten to relax, making the dough much easier to stretch thin without fighting you or tearing. Second, it gives the dough time to develop flavor. The result is a crust with much more character than a quickly made dough, with excellent browning and a crisp, flavorful bite.
And there is another advantage: this dough freezes beautifully. Make a batch, divide it into individual 3-ounce portions, and freeze the dough balls so you have Flammkuchen dough ready whenever you want it.
Prep
Step 1
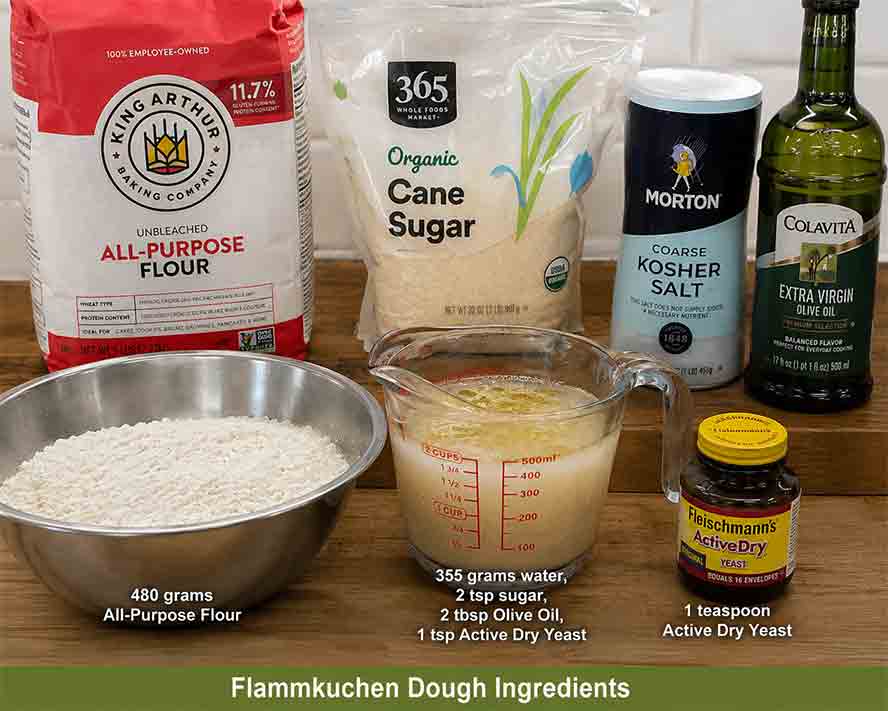
1. Bloom the yeast
Dissolve the yeast in the water with 2 teaspoons of the sugar.
Let stand 5–10 minutes until foamy
Stir in the olive oil.
2. Mix the dry ingredients
In a large bowl combine: the flour, sugar, salt and remaining 1 teaspoon sugar
Step 2
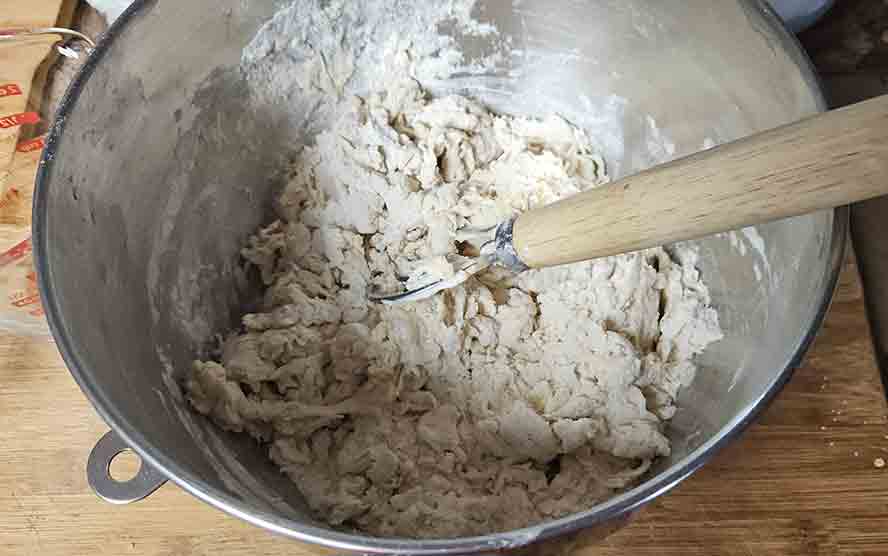
3. Mix the dough
Pour the wet ingredients into the flour mixture and stir just until no dry flour remains.
The dough will be shaggy.
I like using a dough whisk
Cover and let rest 10 minutes.
Step 3
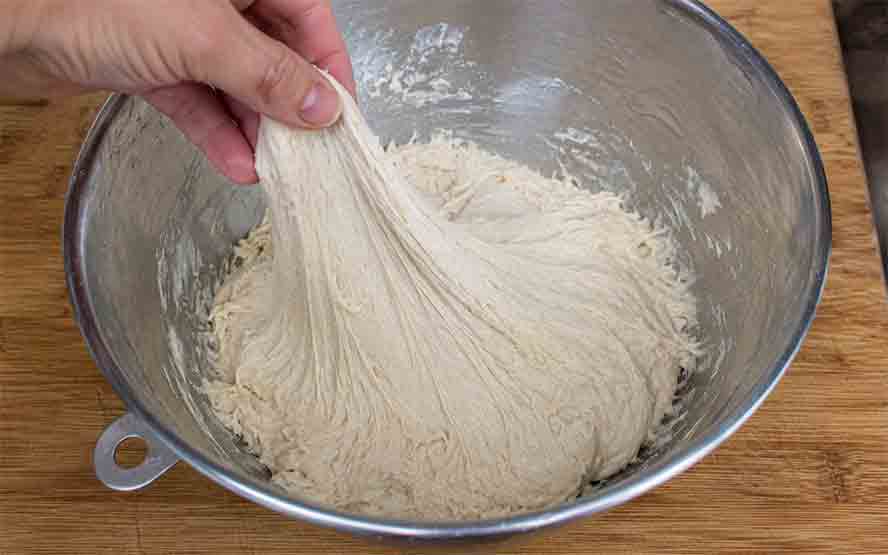
4. Develop the gluten
Perform one set of about 6 stretch-and-folds.
Let the dough rest 10–15 minutes.
Step 4
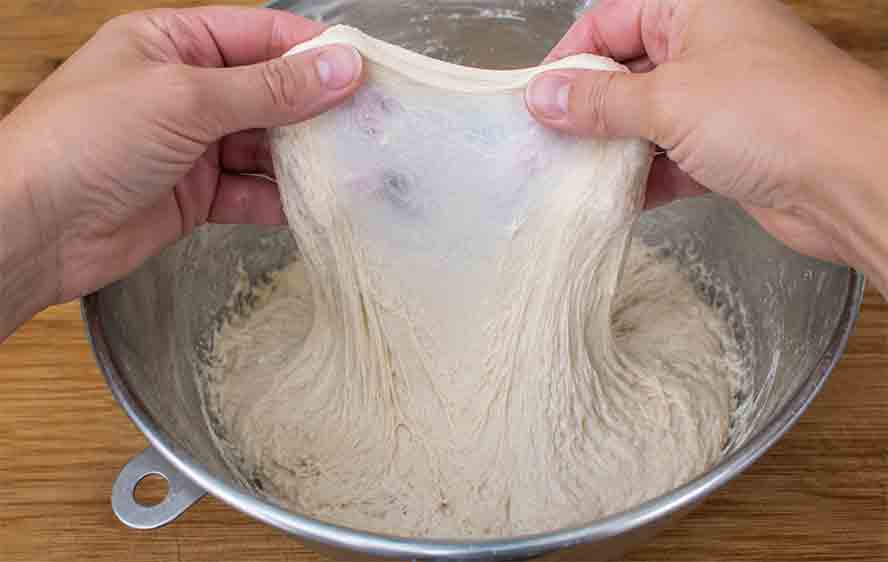
Repeat another set of stretch-and-folds
until the dough becomes smooth and passes
the windowpane test.
Avoid over-kneading. The long fermentation will continue developing the dough naturally.
Step 5
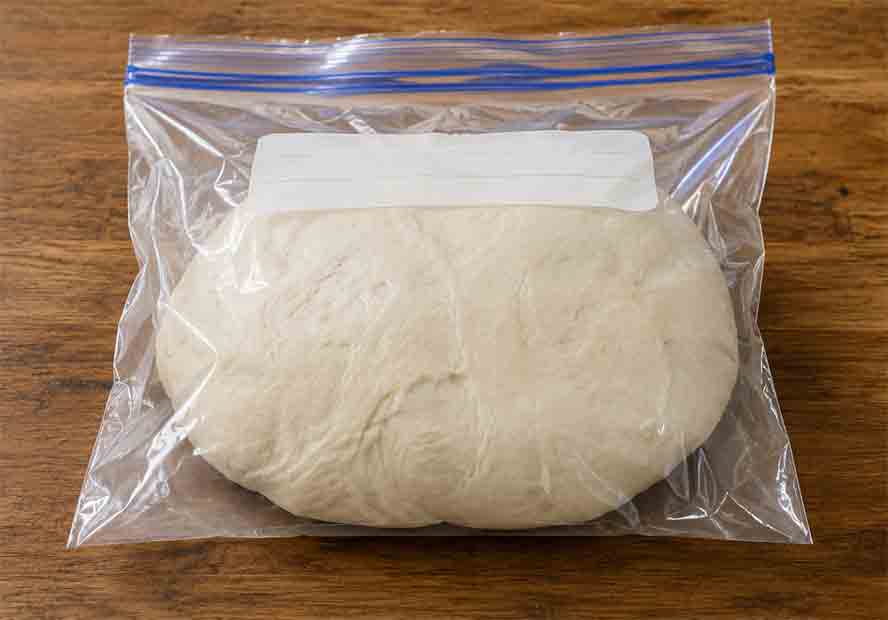
5. Cold ferment
Lightly oil the dough and place it in a covered container or plastic bag.
Refrigerate 2–3 days.
The dough becomes easier to stretch, develops better flavor,
and browns more readily during this time.
Step 6
Stretching the dough
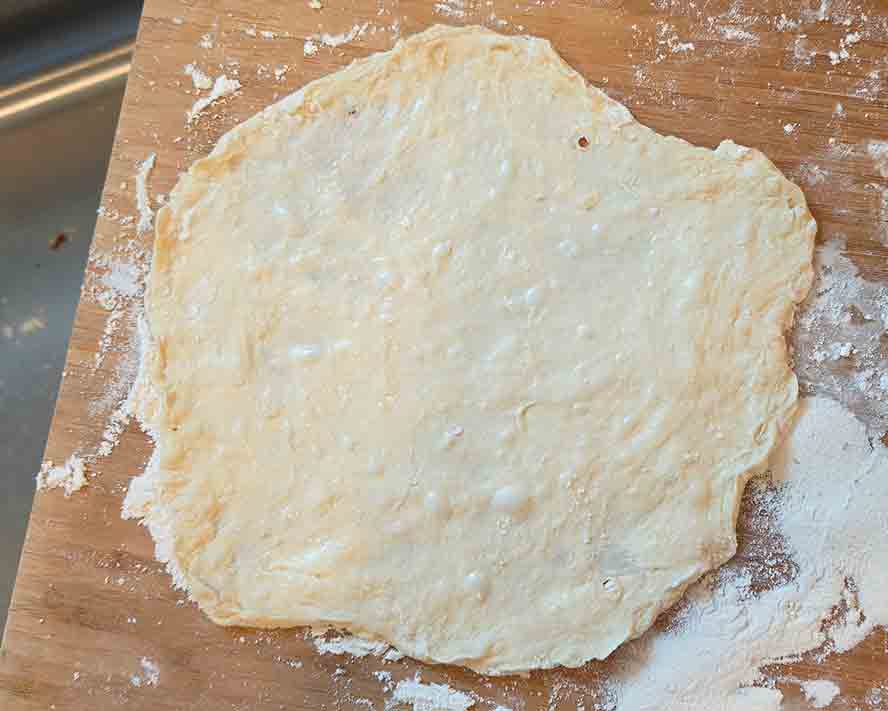
Do not use a rolling pin. Flatten each dough ball gently with your fingertips.
Stretch until the dough resists. Set it aside and work on the next dough ball.
By the time you’ve stretched several pizzas, the first dough will have relaxed and can be stretched again.
Repeat this rotation until each pizza is almost paper thin. In the center,
you should almost be able to see light through the dough.
This gradual stretching produces a thin crust without tearing.
Grilling
Place the dough directly onto a hot grill.Cook until the underside sets and develops light grill marks.
Flip.
Either:
finish cooking both sides and top afterward, or
brown one side, remove it from the grill,
add toppings to the browned side,
and return it to the grill until the cheese melts.
Both methods work well.
Step 7
Freezing the dough
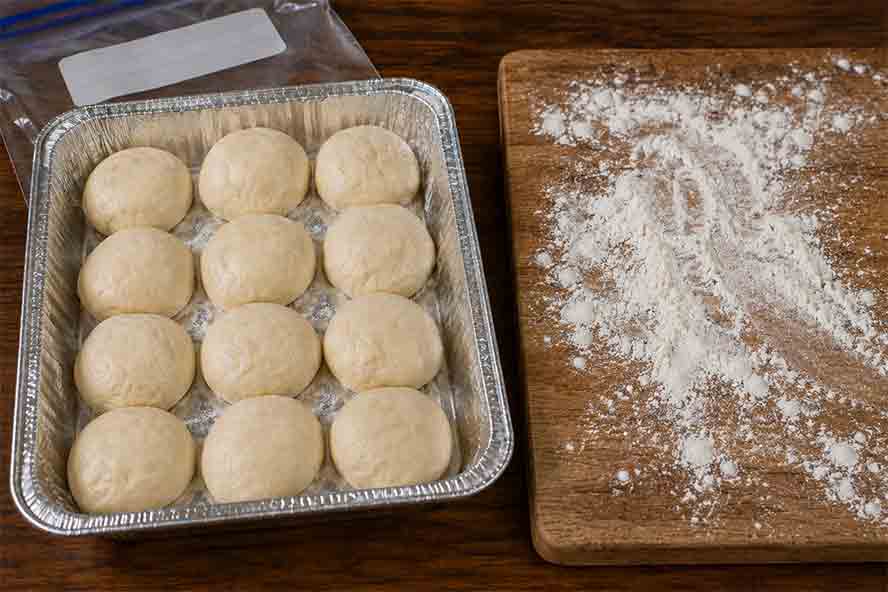
To Freeze the dough after the 2 day fermentation, make 12 small balls about 3 oz in size and put in a greased tray l
like this 10 by 12 foil pan. Put in the freezer overnight.
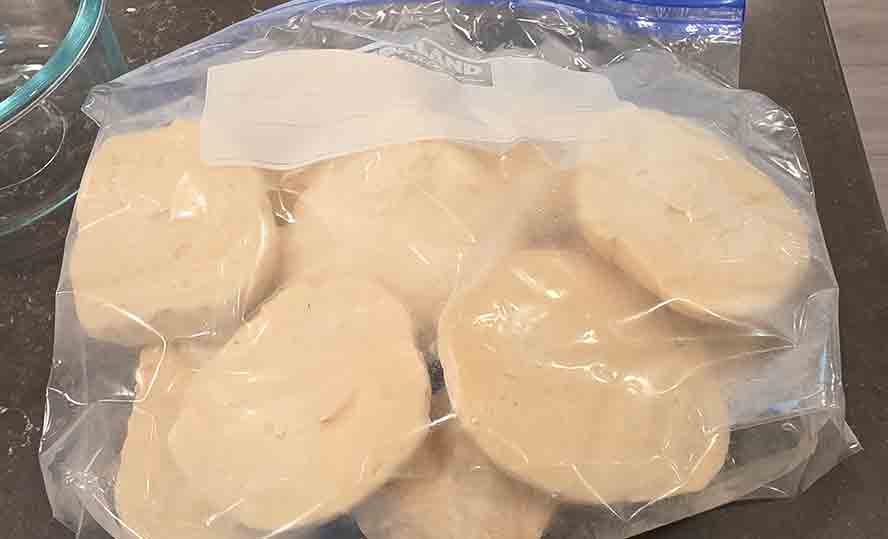
After they are frozen take the balls out of the freezer and place in a plastic storage bag.
To thaw take out and let sit for about 30 to 40 minutes till thawed and the yeast has come back to life.
You can tell it rises and is puffy.
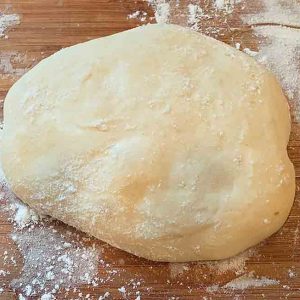
Flammkuchen Dough — Thin, Crisp & Grill-Friendly
Equipment
- 1 Frying Pan
- 1 Half Sheet Pan or Cookie Sheet
- 1 Gallon Plastic Storage Bag
Ingredients
- 4 cups 480 g King Arthur Bread Flour
- 1½ cups 355 g cool water
- ½ teaspoon Fleischmann’s Active Dry Yeast
- 2 teaspoons kosher salt
- 2 tablespoons 30 ml olive oil
- 1 tablespoon 12 g granulated sugar
Instructions
Bloom the yeast.
- Dissolve the yeast and 2 teaspoons of the sugar in the cool water. Let stand for 5–10 minutes, until the yeast becomes foamy. Stir in the olive oil.
Mix the dry ingredients.
- In a large mixing bowl, combine the flour, kosher salt, and remaining 1 teaspoon sugar.
Mix the dough.
- Pour the liquid mixture into the flour. Stir just until no dry flour remains. The dough will look shaggy. Cover and let rest for 10 minutes.
- Using wet or lightly oiled hands, perform one set of about 6 gentle stretch-and-folds. Let the dough rest for 10–15 minutes, then repeat. Continue until the dough becomes noticeably smoother and more elastic. Avoid aggressive kneading; the long fermentation will continue developing the dough.
Cold ferment.
- Lightly oil the dough and place it in a covered container. Refrigerate for 2–3 days. The long, slow fermentation develops flavor while making the dough increasingly relaxed and easy to stretch.
Divide the dough.
- Remove the dough from the refrigerator and divide into portions. For grilling, 3-ounce (85 g) portions make excellent personal pizzas. Gently form each portion into a smooth ball, cover, and allow to rest for 20–30 minutes.
Stretch the dough.
- Do not use a rolling pin. Flatten each dough ball gently with your fingertips and stretch until the dough begins to resist. Set it aside and move to the next dough ball. Return to the first dough and stretch again. Continue rotating between the dough balls until each one is extremely thin. The center should become almost transparent.
Grill or pan-fry.
- For grilled pizza, place the stretched dough directly onto a hot grill. Cook until the bottom is set and lightly browned. Flip and either finish cooking before adding toppings, or remove the crust, add toppings to the browned side, and return it to the grill until the cheese is melted and the crust is crisp.
Notes
Final Thoughts
This dish has endless creative ways it can be prepared.
I would love to see what you come up with.
Please let me know.